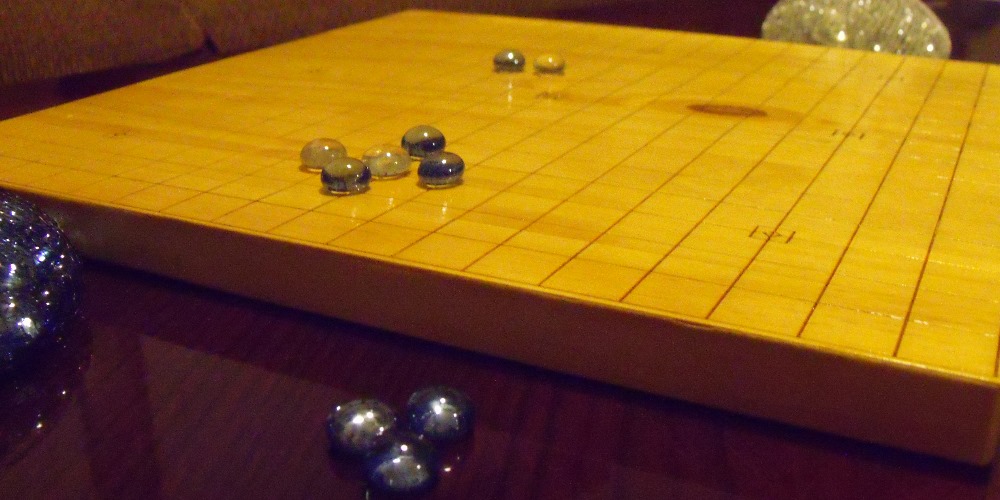
Board games are one of my favorite pass-times. I have what should be a linen closet packed to the brim with the things. From Gloom to Le Have I have games ranging from casual to comples and classic to modern. One game that I did not have and have been wanting to play recently was Go. Since the board is pretty simple and all you need besides that are some beads I figured why not just make it myself rather than spending good money on one of those fancy, overpriced sets.
Parts:
-
Composite board is nice because it is cheap and by the end of finishing the board you will not really notice. My board is about 13" square, you can go bigger if you want. Go 1/2" or 3/4" on thickness.
-
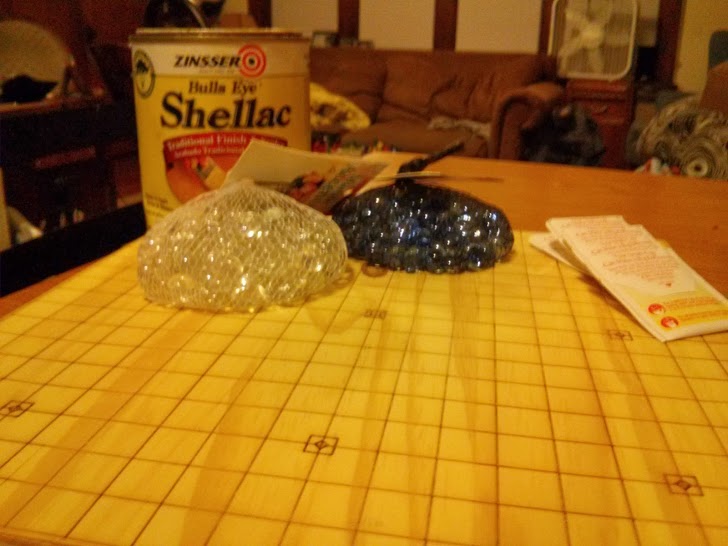
You are going to need two colours, traditionally white and black but as long as they are different it does not matter that much. If you go to your local craft store you should be able to find some nice beads in the floral section with flat bottoms.
-
You could finish it with something else but I really love shellac, it just makes wood look so nice. The quart will go a long, long way past this project so you can consider this cost an investment in nice looking wood things in the future.
-
About 5 tea bags of a dark tea. I used plain old Orange Pico Lipton.
Tools:
If Go is your game the link to my file is below in the files section so if you like it it is all yours. There is also the file for a Thud board I made a while back. If not the first step is going to be making the file. I will not go into much detail on that but I use inkscape because it is free and does everything I need it to. Just measure what you plan on using as pieces and plot your board out accordingly.
When you get to laser cutting you are not trying to cut very deep. What you want is a line that is a mm or two deep and fairly well burnt so it will show up nice later. How you achieve this depends on your laser but I tend to go several passes on low power and mid speed until I get the look I want. If you are planning on having squares that alternate colours, like a chess board or a Thud board, you are going to want to cut quite a bit deeper. Later on I will get into how you cheat and make one board look like you made it out of blocks of differing wood.
As your board is most likely larger than what your game board is the next point of action is going to be removing the excess. If you notice in my file I have an extra line around the board. That line is where I would like the edge of the board to eventually be. This makes a nice guide later on when you go to cut the excess off. I tend to cut just before the line and then take down the rest on a belt sander just to be safe.
Give the whole things a good sanding in prep for the sealing. While you are at it it is a good idea to round the corners and edges just a little.
-
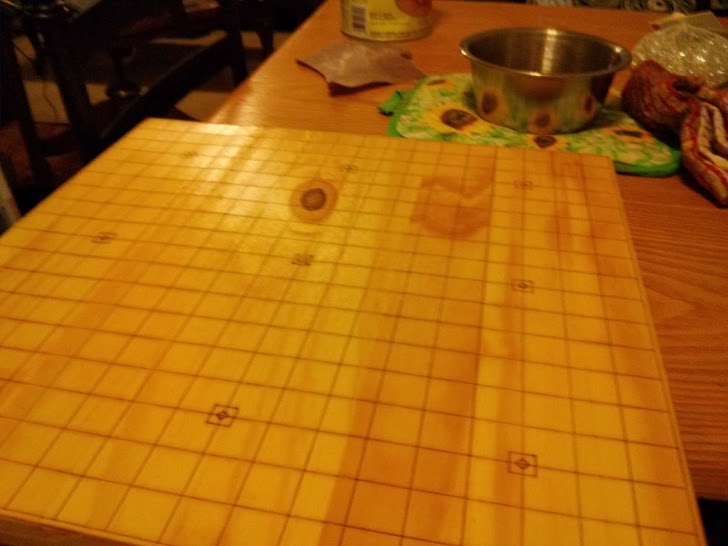
Go put some tea on. Put all five bags in a few cups of water and go read a book or something. You want to burn the hell out of the tea. Let it boil for a good ten minutes and then turn it off and let it cool with the bags in. Once the tea is cool get a rag and apply a few light coats to the board. You want to get it fairly wet but you do not want to soak it. If you get it too wet you could warp the board.
-
For this you are going to need some dark stain, an artist paint brush, and some time, maybe a movie or a podcast, it is going to take a while. Taking only a small amount of stain per trip as to not drip you are going to paint in all of the odd squares. The deep cuts I mentioned earlier are necessary here so that when the wood soaks up the stain it does not bleed into the other squares. It also adds to the effect and makes the odd squares look more so like they are another wood.
Exactly like it says. Keep the coats light and try not to bush any place twice, shellac does not like that. Give the board a light sanding between coats and repeat until you reach the smooth, glossy finish you are looking for. Remember to handle the board only by the edges when possible during this step. Shellac dries quickly but takes a few days to fully cure. During that time it is possible to leave fingerprints in your hard work and nobody wants that.
You are all done. Once the board has had the proper time to cure break it in. If it is not sitting quite right or you want to make sure it is not going to scratch a table you may want to add some of those felt or rubber feet to the bottom but that is up to you.

Files:
Go Board</br>
Thud Board</br>